The track can be installed onto the track bracket in the same fashion as described in section 8.0 – ceiling track fixing. Along with that guidance, ensure to follow the additional information below that are specific to the turntable and will overrule section 10.0
When fixing the ceiling track systems around a turntable, it is critical to remember that the turntable track will be 12mm lower in height than the standard installation height of a ceiling track. Therefore, the ceiling track system must be lowered in height. Follow the process below to align runoff tracks.
Ensure that the turntable has already been set up correctly for the install, see section 7.6.
1. As the turntable track height is 12mm lower than a standard ceiling track installation. When installing the standard ceiling track, place 12mm nylon spacers between the ceiling and the track bracket to remove the height difference. If the ceiling is not level, refer to section 1.6.3.
2. When fixing the ceiling track system, the turntable must be used as a reference fixing point to ensure that the ceiling track system will align with the positioning of the turntable.
3. Fix the track onto the turntable track bracket as described in section 10.0
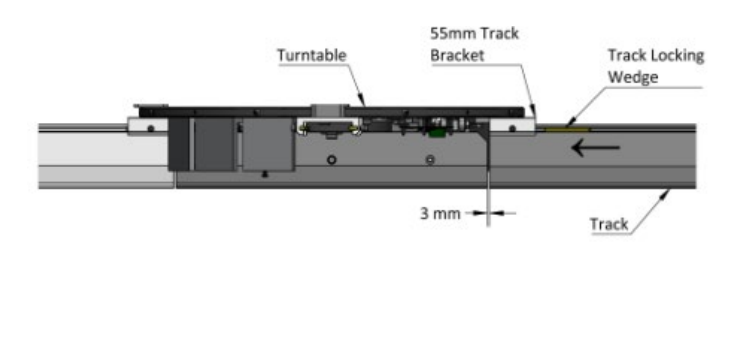
4. The ceiling track systems that are fixed to the turntable track brackets must be aligned as close to the turntable track as possible, there should be between 3mm gap between the tracks to allow the rotating turntable track to rotate without making contact, the gap should be no larger for the safety of the track transition.
5. The ceiling track can be adjusted within its fixing in the track by loosening the M3 screws in the bracket, there is no need to remove the wedges.
6. Once the tracks have been aligned, the turntable fixing has been completed.