Fixing the moving track onto the trolleys is very similar to fixing a fixed track to a track bracket, other than the fact the trolley is not fixed in place. See below on the track installation onto the h-system trolleys.
The single-track, double track and heavy-duty track are all installed in the same fashion shown below.
Raise the track and align the top face with the trolley track brackets as shown, ensure that each track bracket aligns perfectly with the track.
Once the track is aligned, the track locking wedges are required to secure the track, a total of four wedges must be fitted, two either side as shown and are inserted in the opposite directions. Once the wedges have been fitted, the two M3 screws on either side of the track bracket must be tightened to secure the track.

Refer to section 10.2 for the installation of the end cap, end stops and safety bolt.
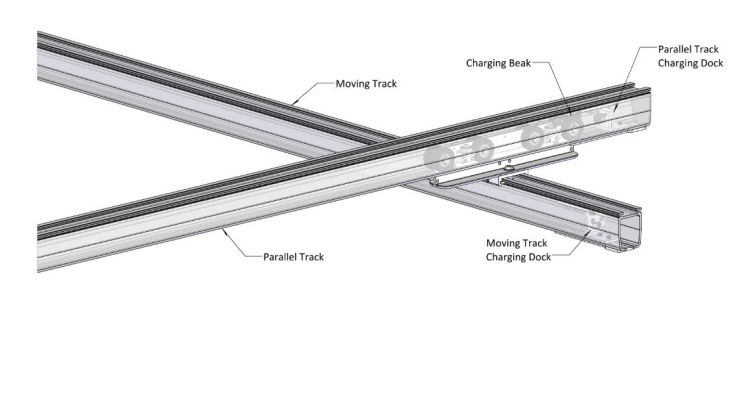
8.2.1 Fixing the Charging Dock onto the Moving Track
The procedure below will instruct on how to fix the charging dock onto the moving track and how to link the dock with the h-system trolley charging beak. Refer to section 8.1.1 before fixing the charging dock to the moving track.
1. Place the charging dock into the moving track with the dock facing inward.
2. Ensure to place the dock at the end of the track where the h-system trolley with the charging beak is located.
3. Secure the dock in place by tightening the bolts. A 5mm Allen key is required.
4. Route the charging wire through the bottom of the track and up to the top face, using self-adhesive retaining clips on the top of the track up towards the trolley.