For each installation of a turntable, the setting up will vary, this will also depend on whether a powered turntable or a manual turntable is used. As mentioned previously, the manual provides a maximum of 14 track runoffs and the powered provides 10.
Depending on the number of tracks linked to the turntable for installation, a set-up is required for the installation.
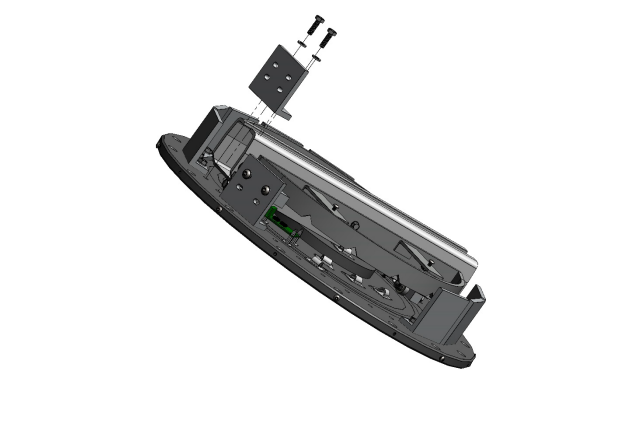
7.6.1 Removing the Covers
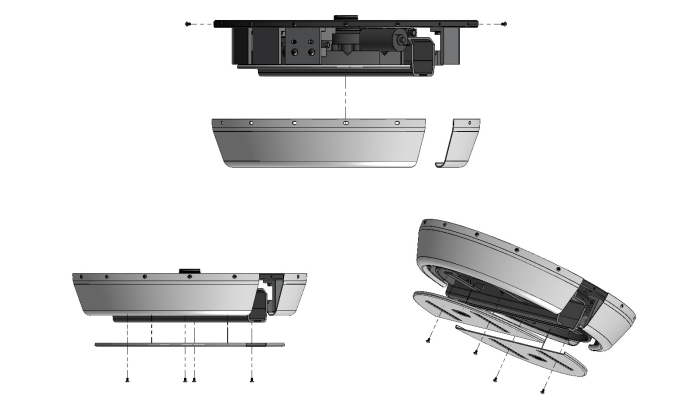
To gain access to the internals of the turntable, the covers must be removed. Follow the procedure below to remove the covers from the product.
1. Using a 2.5mm Allen key, remove all the fixings around the external cover. Ensure to grab the screw and the washer.
2. To remove the bottom covers, use a 2.5mm Allen key to release the four screws and washers. Refitting is a reversal of the removal process.
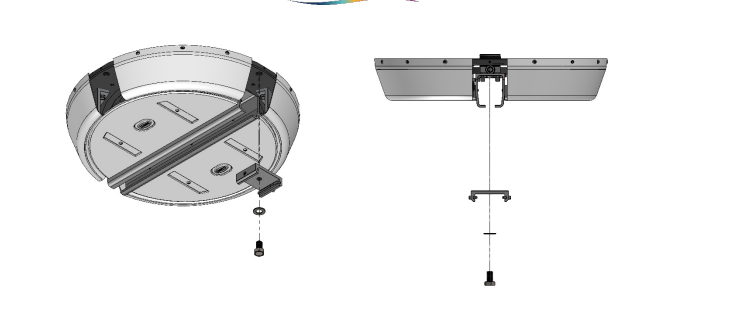
7.6.2 Fixing the Track Brackets
For a turntable a single 55mm unthreaded track bracket must be used. Fix a track bracket at all locations where a track is intended to link with the turntable.
1. Align the track bracket with the mounting hole on the base plate. Ensure that the track bracket is aligned in the correct orientation to allow the track to be fitted in its intended direction.
2. Place an M12 bolt through the track bracket and into the mounting hole.
3. Ensure that a washer is in between.
Removal is a reversal of the fitting process.
7.6.3 Adjusting the L-Brackets
The L-brackets must be fitted at all mounting positions where a track bracket has not been installed. This is to stop a hoist from traversing of the turntable. The follow process will instruct on how to remove and fix a turntable L-bracket.
1. Using a 10mm spanner, remove the two bolts securing the L-bracket to the base plate. Ensure to grab the washer also.
2. To fit an L-bracket, ensure that the bracket is fitted in the correct orientation. See the images below.