9.15 Air Grommet
This section will instruct the correct procedure on how to remove and replace the Air Grommet.
Removal
Step 1 – Remove external covers off the Hoist. (refer to section 9.1)
Step 2 – Remove the Battery from the battery brackets. (refer to section (9.3)
Step 3 – Remove QRS Hook. (Refer to section 9.6)
Step 4 – Remove Bottom cover from Hoist. (Refer to section 9.7)
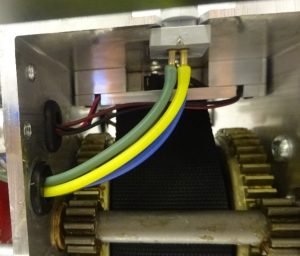
Step 5 – Remove the two Coloured Air Tubes from the Air Switches on the PCB.

Step 6 – Pull all four Air Tubes through the Black grommet in the Chassis Wall.
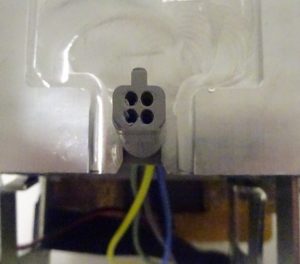
Step 7 – Simply slide the Air Grommet from its positioning and remove.

Refitting / Replacement
Step 8 – Refitting is a reversal of the removal process noting the following point:
1. Ensure that when repositioning the Air Grommet, it is in the correct orientation as shown below
2. Once the Air Tubes have been refitted, make sure to have pulled the tubes all the way through the Chassis. They should not be left slack inside the Chassis.