4.3.4 Installing TX Advanced – Quick Release Track (QRT)
For a TX with a QRT system, the trolley must first be installed into the track before attaching the hoist to the trolley.
To install the TX Trolley, follow the guidance below:
1. Complete all the relevant steps in section 4.1.
2. Complete all the relevant steps in section 4.2.
3. A step ladder is recommended for easier and safer installation.
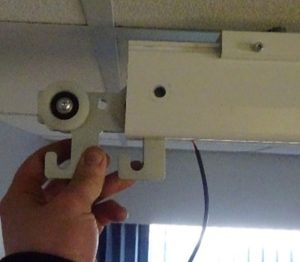
4. Align the trolley horizontally with the Ceiling Track entrance, with the attachment L-Shaped hooks facing downward.
5. Ensure the charging port is leading into the track. The charging port is circled.

6. Carefully place the Trolley into the track without damaging the component.
7. Using the wheels, slide the Trolley away from the end of the ceiling track for safety.


8. Reverse the Steps in section 4.1 to secure the ceiling track entrance. Fitting the end stop, safety bolt and end cap correctly.
9. Trolley Installation Complete.
To remove the Trolley, follow the steps above in reverse.
To install the Hoist onto the Trolley, follow the guidance below:
1. Complete all the relevant steps in section 4.1.
2. Complete all the relevant steps in 4.2.
3. Complete all the relevant steps in 4.3.4.
4. A step ladder is recommended for easier and safer installation.
5. Disengage the plunger on the trolley to allow attachment access.
6. Raise the TX to the height of the Trolley as shown.
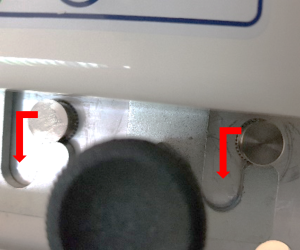
7. Align the anchor points with the trolley hooks, into its profile.
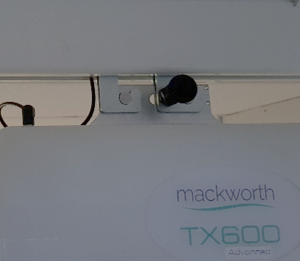
8. Engage the plunger to lock the Hoist into the Trolley.
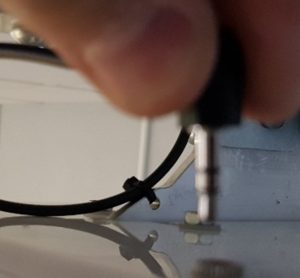
9. Plug the Charger lead into the hoist cover.
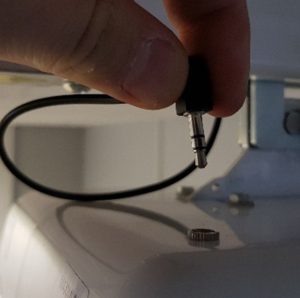
10. Cable tie the lead onto the chassis frame as shown.
11. Hoist installation complete.
To remove the Hoist, follow the steps above in reverse order noting the following points:
– Traverse the Hoist to the Trolley set dismount point, ensure to align the hole in the trolley with the hole in the track.
– Remove the Pin from the clip and place it through the track to secure the Trolley, this will allow the hoist to be dismounted. Then follow the installation guide in reverse to detach the hoist from the trolley.