9.14 Traverse Shaft and Idle Gear (Powered Models Only)
Within this section it will explain the correct procedure on removing and reinstalling the Traverse shaft and Idle Gear for servicing procedures or replacement.
Removal
Step 1 – Remove external covers off the hoist (refer to section 9.1)
Step 2 – Remove the PCB from the hoist (refer to section 9.2)
Step 3 – Remove the Battery from the battery brackets (refer to section (9.3)
Step 4 – Remove the Traverse Motor from the hoist (refer to section (9.4)
Step 5 – Using a small slotted screwdriver remove the 8mm E-clip from the Traverse Shaft
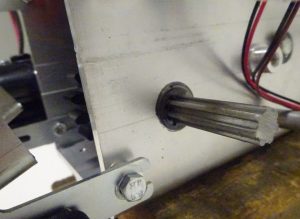
Step 6 – Remove the washer from the Traverse Shaft
Step 7 – While supporting the two spacers and Idle Gear, labelled 1, 2 and 3 in the image below, slide the drive shaft out of the Chassis
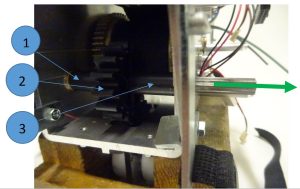
Step 8 – Remove the Spacers and Idle Gear from the Chassis.
Refitting / Replacement
Step 9 – Refitting is a reversal of the removal process noting the following point:
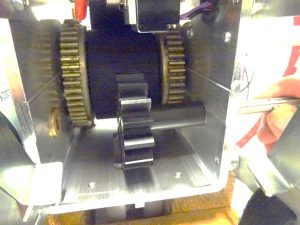
1. While reinserting the Traverse Shaft, you must one by one, align the spacers and Idle Gear to allow the Traverse Shaft to pass through
2. The LONGER Spacer (37.1mm – use Vernier calliper to measure) + (Number 3 in the image above) will be aligned first as shown.

3. Then the Idle Gear must be fitted to the Traverse Shaft as shown
4. Align the SHORTER Spacer (34.3mm), then slide the Traverse Shaft all the way through the Chassis and into the Bush in the opposite Chassis Wall
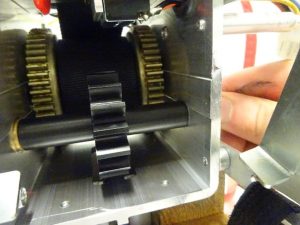
5. Use long noise pliers to reattach the 8mm E-Clip onto the Traverse Shaft